Classic Outlook vs New Outlook
Mohawk is transitioning to Microsoft Office 365 as part of our move to Windows 11. This FAQ will help you understand the differences between Classic Outlook and New Outlook. If you have questions, contact the IT Service Desk.
Classic Outlook App Icons
New Outlook App Icon![]()
Classic Outlook Instructions
Add a Shared Mailbox to your Outlook Profile
How to Add a Shared Mailbox
Warning:After adding a shared mailbox, you may not see mail items right away. Larger mailboxes will take longer for Outlook to synchronize.
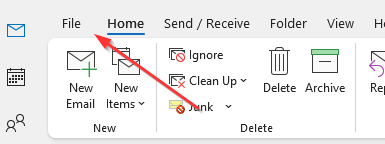
- Click File, then click Add Account

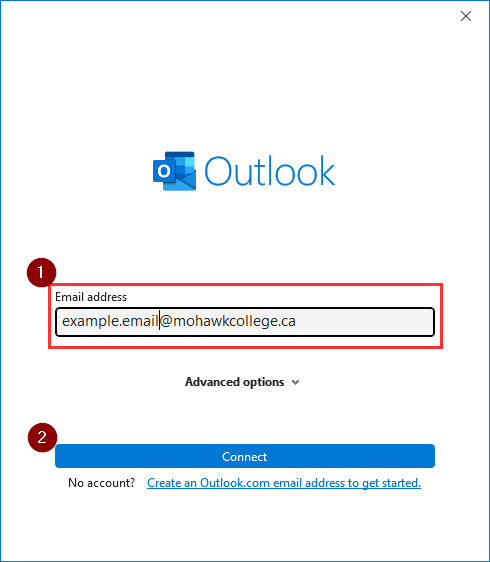
- Enter the full email address of the mailbox you wish to add, then click Connect
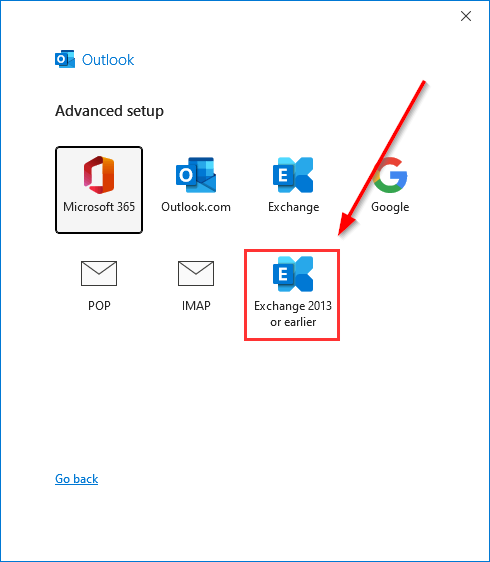
- Select Exchange 2013 or earlier
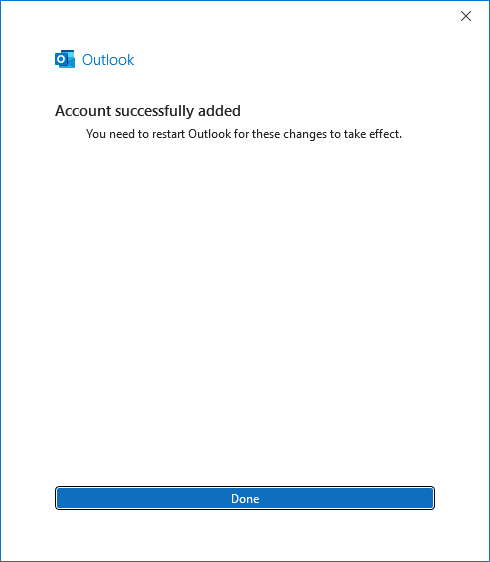
- Outlook will say the account has been added successfully and will tell you to restart outlook. Fully exit and restart Outlook.
- After restarting outlook you will find the mailbox added to the navigation pane on the left.
Note: Don’t panic if you do not see mail items immediately. It may take some time for Outlook to synchronize mail items depending on the volume in the mailbox.
Add a Shared Calendar to your Outlook Profile
How to Add a Shared Calendar
Warning:After adding a shared calendar, you may not see calendar items right away. Larger calendars will take longer for Outlook to synchronize.
- Go to the calendar view in Outlook
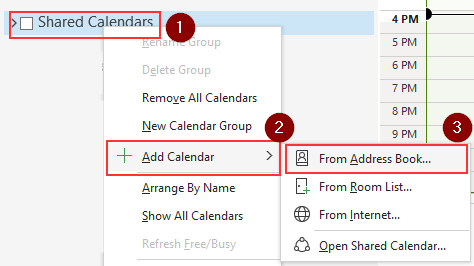
- In the left-side calendar navigation pane, right-click Shared Calendars, then click Add Calendar and From Address Book
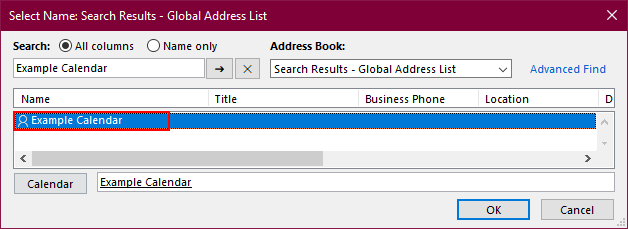
- In the Address Book dropdown click Global Address List

- In the search box, enter the name of the calendar you want to add and press enter.

- In the search results, double-click the calendar to select it. It will be added to the calendar bar at the bottom of the search window.
- Repeat step 4 and 5 if there are more shared calendars you want to add.
- When your desired calendars are added to the list, click OK
- Fully exit and restart Outlook.
- Your added calendars will appear in the Shared Calendar list
Warning: Don’t panic if you do not see calendar items immediately. It may take some time for Outlook to synchronize calendar items depending on the volume of items contained in the calendar.
Add Outlook to your Mobile Device
Setup the Outlook App for Android
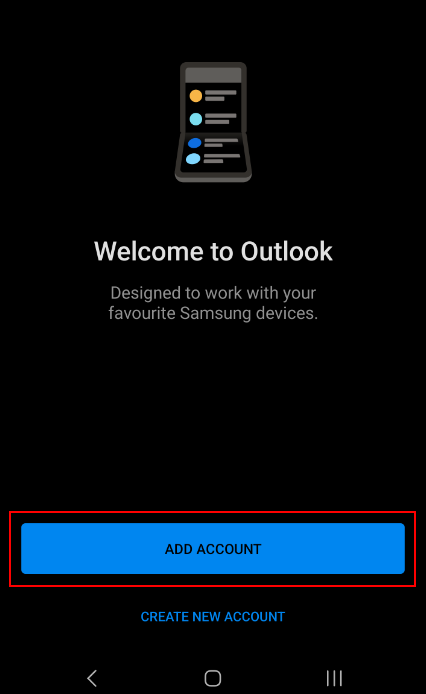
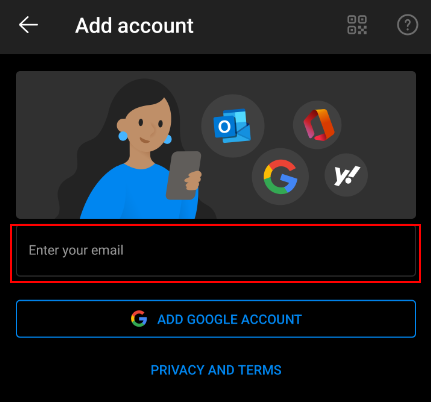
- Open the Outlook app and tap Add account.
- Enter your email address, firstname.lastname [at] mohawkcollege.ca (firstname[dot]lastname[at]mohawkcollege[dot]ca) and tap Continue.
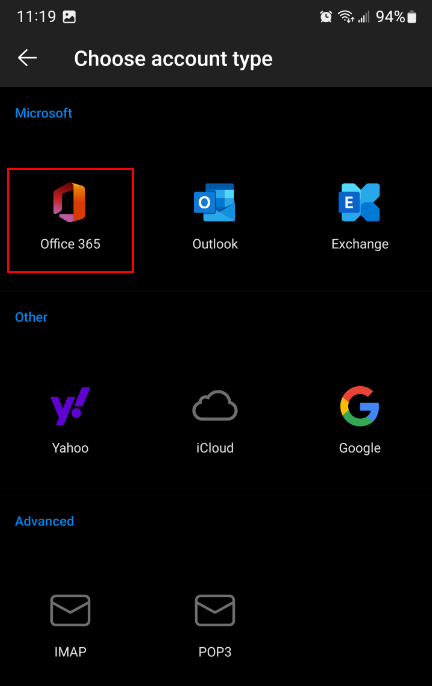
- On the next screen, tap Office365.
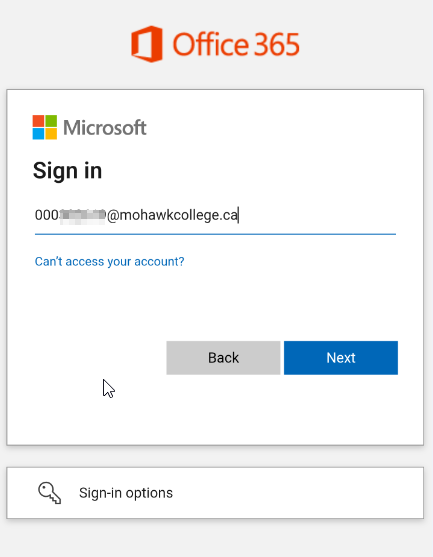
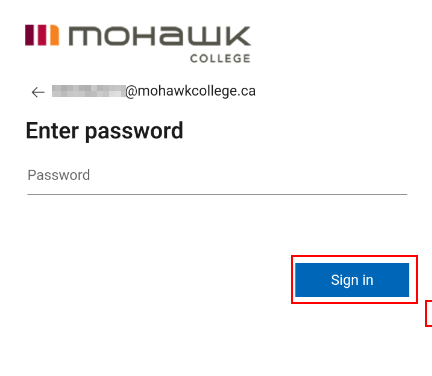
- Enter your username EmployeeID [at] mohawkcollege.ca (EmployeeID[at]mohawkcollege[dot]ca) (e.g. 000101060 [at] mohawkcollege.ca (000101060[at]mohawkcollege[dot]ca)) and password. Tap Sign In.
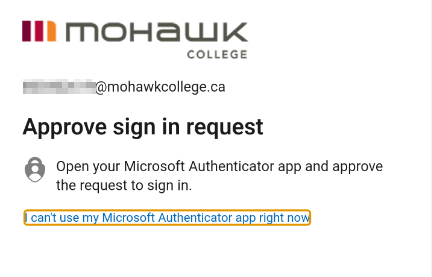
- You may need to answer a multi-factor authentication prompt to continue.
- When asked if you want to add another account, tap Maybe Later
Setup the Outlook App for iOS
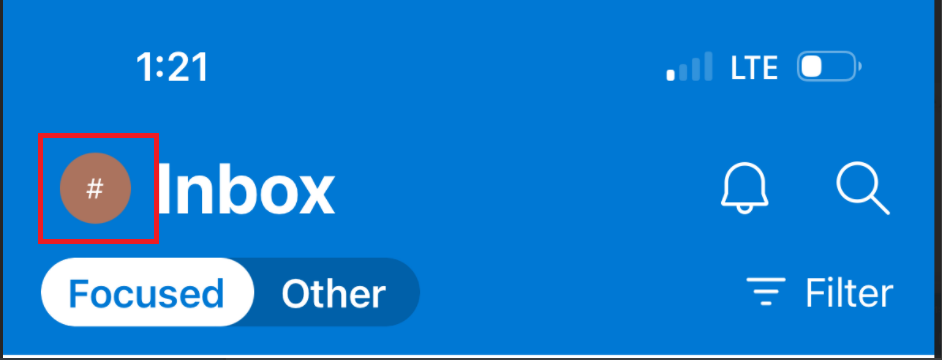
- Open the Outlook app and tap the # icon at the top of your inbox.
- At the bottom of the screen, tap the gear (settings) icon.
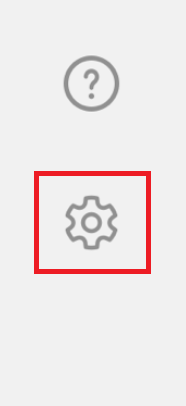
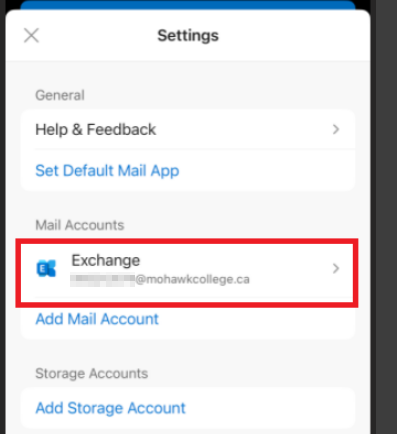
- Tap your Exchange email account, then tap Delete Account.

- Restart the Outlook app, then tap Add account.
- Enter your username EmployeeID [at] mohawkcollege.ca (EmployeeID[at]mohawkcollege[dot]ca) (e.g. 000101060 [at] mohawkcollege.ca (000101060[at]mohawkcollege[dot]ca)). Tap Add Account.

- Accept the multi-factor authentication prompt.
- Enter your username EmployeeID [at] mohawkcollege.ca (EmployeeID[at]mohawkcollege[dot]ca) (e.g. 000101060 [at] mohawkcollege.ca (000101060[at]mohawkcollege[dot]ca)) and password. Tap Sign In


- When completed, the app will ask if you want to add another account. Tap Maybe Later

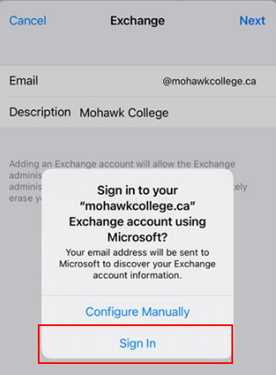
Add your Email to iOS' Default Mail App
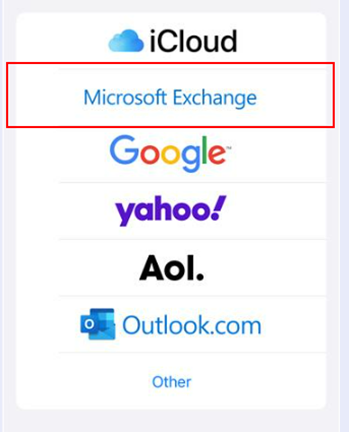
- Tap the Mail app.

- Tap Microsoft Exchange.
- Enter your email address (firstname.lastname) and the description Mohawk College

- A prompt will appear. Tap Sign In.
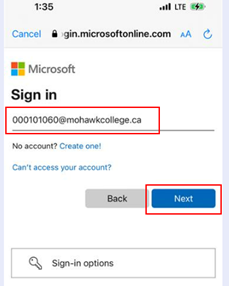
- Enter your 9-digit MohawkID [at] mohawkcollege.ca (MohawkID[at]mohawkcollege[dot]ca) (e.g. 000101060 [at] mohawkcollege.ca (000101060[at]mohawkcollege[dot]ca)), then tap Next.
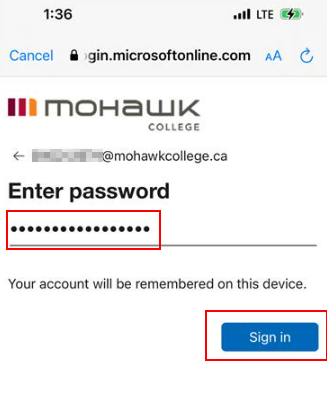
- Enter your password, then tap Sign In.
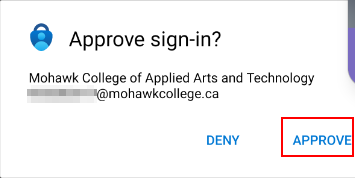
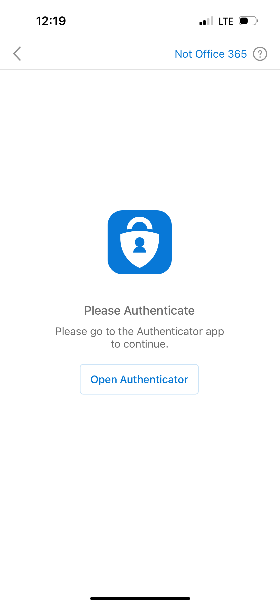
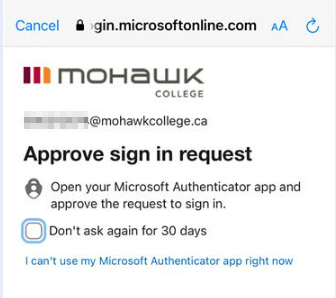
- You must authorize the login using your Authenticator app. Follow the prompts to approve the login request.
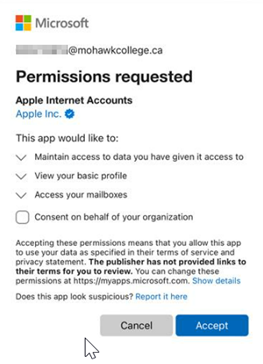
- Accept the permission request.