Use SharePoint to create websites and empower teamwork with dynamic and productive sites for every project team, department, and division. It is important to understand how to collaborate securely and ensure your sites and files are only being accessed by those you trust.
What are Microsoft 365 Groups?
A Microsoft 365 group is a single permissions group associated with various Microsoft 365 services. A group includes a SharePoint site, an instance of Planner, a mailbox, a shared calendar, and others. (e.g. Site Owner, Site Member, Site Visitor)
SharePoint Sites
SharePoint has Team Sites and Communication Sites.
Should I create a Team site or a Communication site?
Use a Team Site to collaborate with other team members or others on a specific project. With a team site, all or most members can contribute content to the site. The information is limited to only the team members, project, and specific stakeholders.
A Communication Site is the better choice if you intend to broadcast information to a broad audience. With a communication site, only a small set of members contribute content consumed by a larger audience.
Team Sites
Private by default. A Team Site connects you and your team to shared content and resources. Use team sites to store and collaborate on files, create and manage lists of information, track and update project status, and organize and co-author shared content. Team Sites are part of a Microsoft 365 group, including a mailbox, shared calendar, and other collaboration tools.
Note: If your SharePoint Team site is connected to Microsoft Teams, adding users to the SharePoint group will also give them access to your Teams team.
How to Add a Member to Your Team Site
Adding members to your Team Site will let them edit and view content.
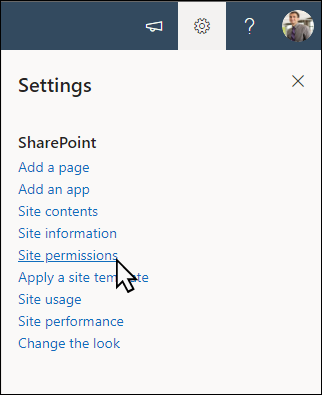
- Click Settings and then Site Permissions.
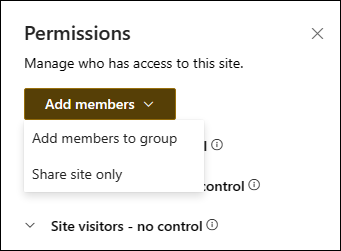
- Click the Add Members dropdown, then choose Add Members to group.
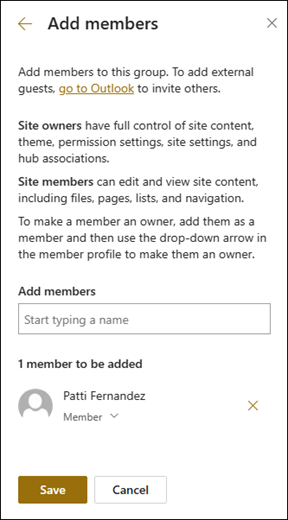
- Click Add Members.

- Enter the name(s) of all users you want to add to the group, then select their permissions (Visitor, Member, Owner).
- Click Save
How to Share a Team Site without Adding Group Membership
You can share the site without giving someone membership to your group.
- Click Settings and then Site Permissions.
- Click the Add Members dropdown, then choose Share site only.
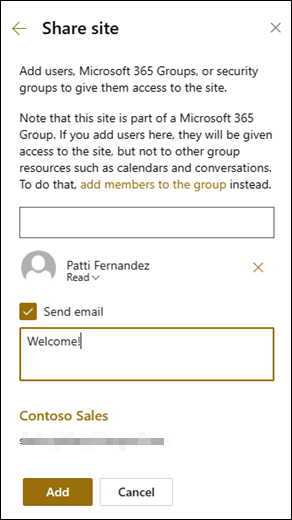
- Enter the names of the users you want to grant access to site content and select their level of control (Read, Edit, Full Control)
- Enter an optional message to send with the email notification that will be sent when the site is shared, or clear the Send email checkbox if you don't want to send an email.
- Select Add when finished adding members and setting permissions.
Communication Sites
Public by default. Communication sites are for broadcasting news and status across the organization. These sites are not connected to Microsoft 365 groups and use the standard SharePoint Owner, Member, or Visitor permissions.
Usually, with communication sites, you'll have one or more owners, a relatively small number of members who create the content for the site, and many visitors who are the people you're sharing information with.
You can permit people to access the site by adding individual users, security groups, or Microsoft 365 groups to one of the three SharePoint groups.
The visitor's group is an excellent place to use security groups. This is the easiest way to add many users to a site in many organizations.
How to Share Communication Sites
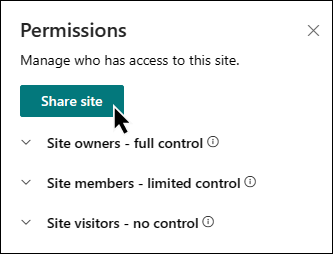
If you're a Microsoft SharePoint site owner, you can give others access to the site by adding them as owners, members, or visitors.
Share your site with others after you've customized it, reviewed it, and published the final draft.
- Click Settings and then Site Permissions.
- Click Share Site
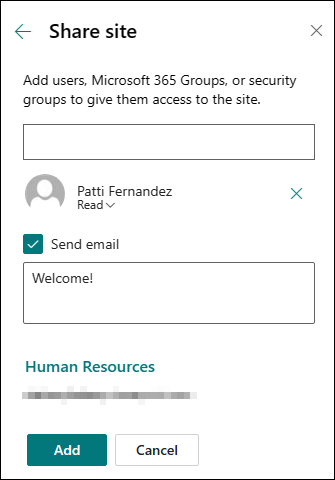
- Enter the names of the users you want to grant access to site content and select their level of control (Read, Edit, Full Control)
- Enter an optional message to send with the email notification that will be sent when the site is shared, or clear the Send email checkbox if you don't want to send an email.
- Select Add when finished adding members and setting permissions.
Sharing Files in SharePoint
The files you store on a SharePoint site are generally available to everyone with permission to access the site. Still, you may want to share specific files or folders with people who don't otherwise have access to the site. When you share files and folders, you can decide whether to let people edit or view them. You can see who a SharePoint file is shared with, stop sharing SharePoint files or folders, or change permissions anytime.
How to Share Files
- Open your SharePoint site and navigate to your Documents library.
- Select its circle icon to pick the file or folder you want to share.
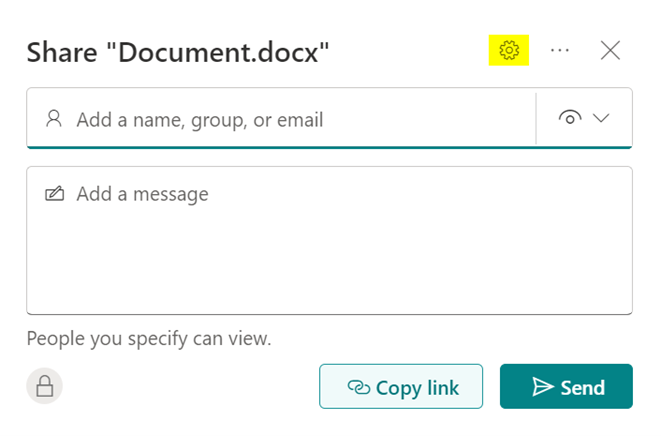
- Select the Share Icon
 to the right of the item.
 - Select the gear icon in the top left to open the Share settings.
- Select who you want to give access to with the file link.
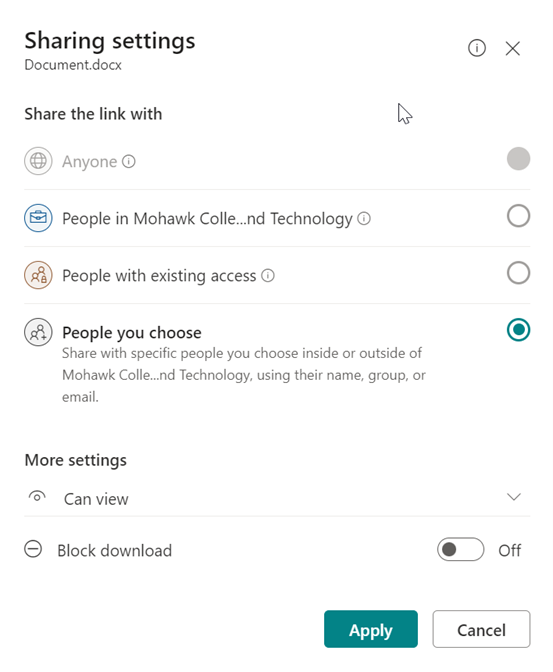
- People in Mohawk College with the link will give any Mohawk user who has the link access to the file, whether they receive it directly from you or someone else.
- People with existing access can be used by those with access to the document or folder. It doesn't change any permissions, and it doesn't share the link. Use this to send a link to somebody who already has access.
- Specific people will give access only to those you specify, although others may already have access. You can include people outside of your organization. If people forward the sharing invitation, only those with access to the item can use the link.
- Under More settings, you can set any of the following options:
- Can edit lets people signed in with a Microsoft Account edit the files or folders they can access. If you're sharing a folder, people with Edit permissions can copy, move, edit, rename, share, and delete anything in the folder they have access to. Unchecking this box means people can view, copy, or download your items without signing in. They can also forward the link to other people. However, they cannot make changes to the version on your SharePoint. Some links have limited options and are only anonymous links.
- Block download prevents people from downloading the files or folders they can access. Unchecking this box means that people can download the files onto their devices. Note: This option might not be available for your selected file type. This option is only available if you don't allow editing.
- Word documents only: Open in review mode only limits people to leaving comments and making suggestions on the file. If someone already has editing permissions for the document, selecting Open in review mode will not prevent them from making edits. For them, the document will open in edit mode.
- Once you have set all your link settings and permissions, select Apply.
- In the Name, Group or Email field, start typing the email addresses or contact names of people you want to share with. When you enter info in the box, you can also choose a contact from the list that appears.
- If you want, include a message below the Name, group or email field.
- Select Send.
If the selected file or folder is shared with someone already, there is a Shared with list at the bottom. Each image is either the profile photo of an individual or the initials of a group that the file has been shared with. If you want to edit the access level for an individual or group, select a photo or group initials to open Manage Access.
If the selected file or folder isn't currently shared with someone, there won't be a Shared with list.
Channel Sites
Note: Channel sites are not created through SharePoint – only Microsoft Teams
Channel sites are team sites associated with a specific channel in a Microsoft Teams team. Both private and shared channels create separate SharePoint sites just for the channel.
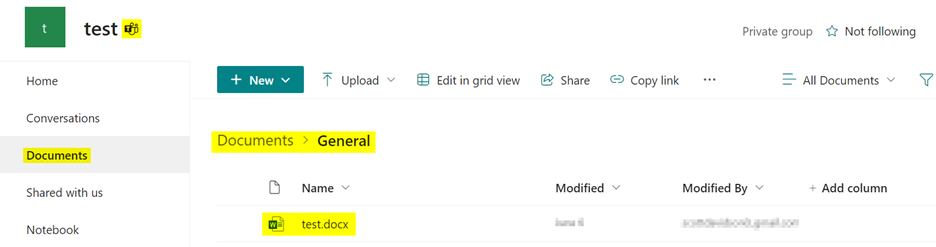
The Microsoft Teams logo next to the SharePoint site name indicates it is a SharePoint Channel site.

Should I store my files in SharePoint or Microsoft Teams?
Microsoft Teams is the hub for teamwork. It allows for collaboration, chat, calls, meetings, and more. SharePoint Online is primarily a document management and intranet platform where you store, collaborate, and share information seamlessly across the organization, and it is also part of Microsoft 365.
Every time you create a new Microsoft Team, the following are also created in the background:
- Microsoft 365 Group
- SharePoint Online site
- Exchange Online shared mailbox & calendar
- OneNote notebook
- Other services like Power BI and Planner
Note: Files shared in private chats will be stored in the sender's OneDrive for Business.
As you can see above, a site is created to store your documents. Each time you share files in a Team, they are stored in the associated site in SharePoint, not in Microsoft Teams.
But where are my files exactly?
The exact location depends on which Team channel you shared them in. By default, there's a General channel (which can't be deleted), and the files shared in this channel will be stored in the SharePoint site, in the Documents library, and within the General folder. If you create a Team channel called "Project A," files shared in this channel will be stored in SharePoint under the "Project A" folder. This applies to 'Standard' channels. Private channels have a different architecture consisting of a separate site with different permissions from the Team.
Terminology is important. A channel name in Microsoft Teams will have the same folder name in the associated SharePoint site under the Documents library.
In Teams, your files will be found in the Files tab at the top.
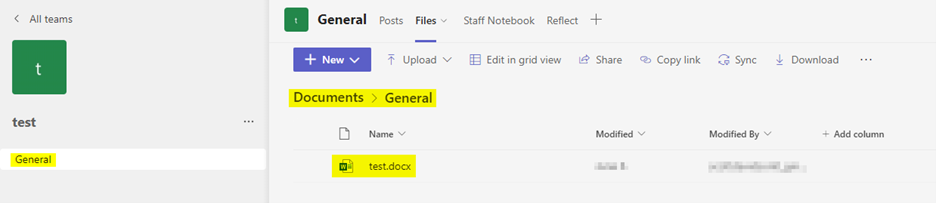
In SharePoint, your files will be found in the Documents menu item on the left.
Who can access or see my files?
As with all content in Microsoft 365, security trimming applies to these files. Users can view and search only content they can access, which is respected between Microsoft Teams and SharePoint Online. Therefore, when you add or remove users from a Team, their access is added or removed from the SharePoint site.
Are my changes reflected?
Yes. Wherever you are making changes to files and documents, they are saved. You always have the latest version of the document, whether in Microsoft Teams or SharePoint Online.
So where should I manage all my permissions, sharing of files, and folders?
Changes are synchronized between your Teams channel and the associated SharePoint channel, so it doesn’t matter where you make changes. However, making all changes through your Microsoft Teams team is recommended for simplicity's sake.
External Sharing
Only Channel sites created from Microsoft Teams can be shared with external users.
