Now that your mailbox and calendar have been migrated to the cloud (Microsoft 365) follow this checklist to verify your new Microsoft 365 Online profile is setup, and how to add shared mailbox and or calendar back into Outlook.
The expected configuration time is approximately 15-45 minutes depending on the number of shared mailbox and calendars.
Remember: While reconfiguring your Outlook profile, you may continue accessing email using the Outlook Web App ⤻ (new tab).
New Microsoft 365 Online Profile Setup
Outlook Web App:
Log in to Outlook Web App to ensure it functions correctly and has transitioned to Microsoft 365: https://outlook.office.com/mail ⤻ (new tab)
Familiarize yourself with the interface and features of the new web version.
New Microsoft 365 Online Profile:
Before starting Outlook when you're moved to Teams, check if your new profile was automatically created.
- Click Start and type "Control Panel"
Click the search result to open Control Panel.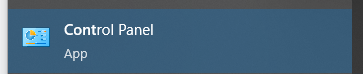
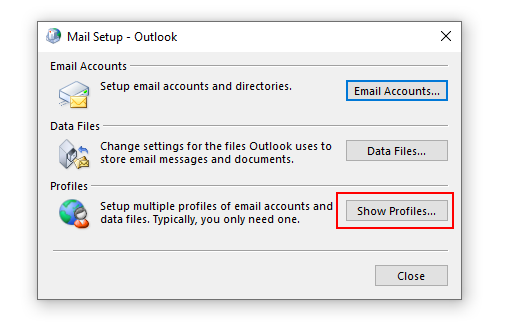
- Use the search box at the top-right of the Control Panel to search for Mail. Click Mail to open the Mail Setup window.

- In the Mail Setup window, click Show Profiles...
- In the Mail Profiles window, look at the profile list and confirm ExOnline is shown.
If ExOnline is not on the list: Close all open windows and follow the instructions in the next section "Recreate Your Outlook Profile"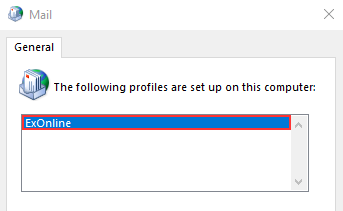
- If ExOnline is shown: Select Always use this profile, choose ExOnline in the drop-down list, then click OK.
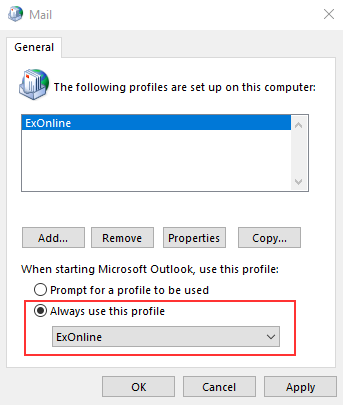
- Close all open windows and start Outlook.
Create a new Microsoft 365 Outlook profile. (Skip this step if your profile was created automatically)
You will only perform these steps if they have not been completed for you by automatic processes.
If you require immediate access to your email, log in to Outlook.com (new window)
When your Outlook profile is moved to the cloud, you must recreate it on your computer.
- Click the Start button and type in "Control Panel" to find the Control Panel app. Click it to open Control Panel.
- Use the search box at the top-right of the Control Panel to search for Mail. Click Mail to open the Mail Setup window.
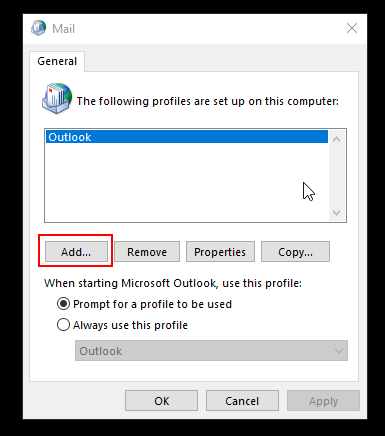
- In the Mail Setup window, click Show Profiles...
- In the Mail Profiles window, click Add...
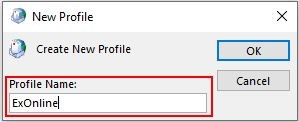
- In the pop-up, name the new profile ExOnline. Double-check that the name matches completely, then click OK.
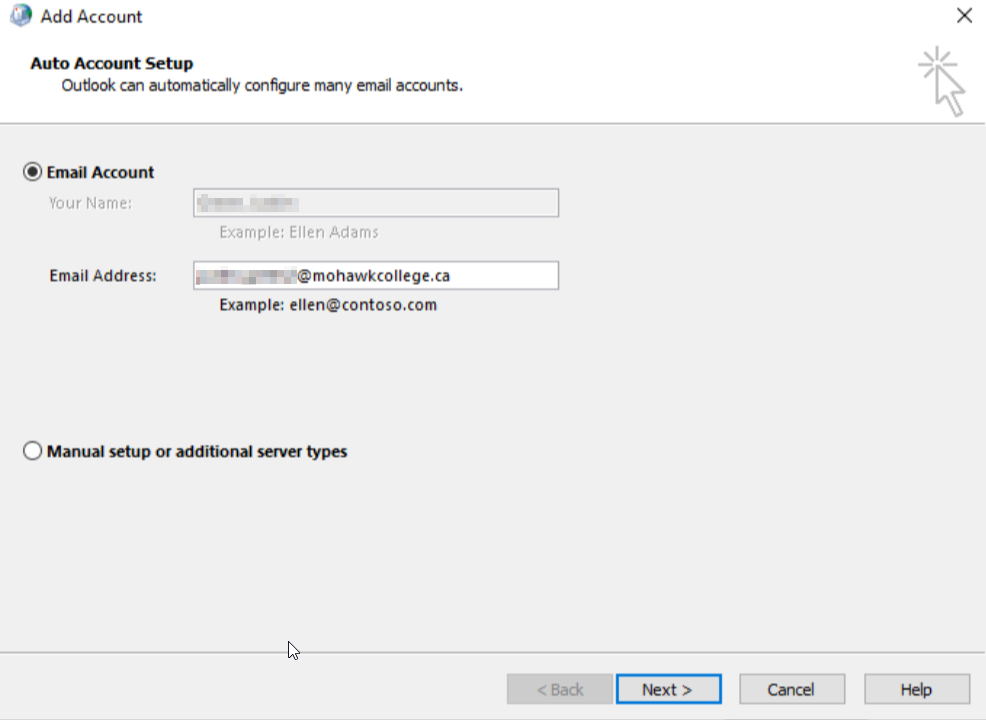
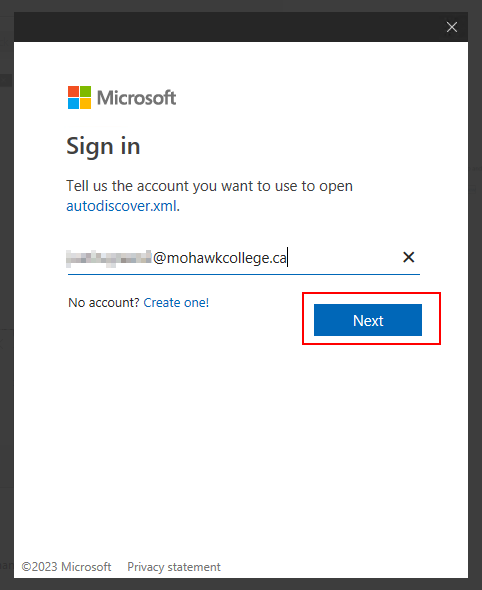
- The Add Account window will appear and show pre-set information for your account. Click Next
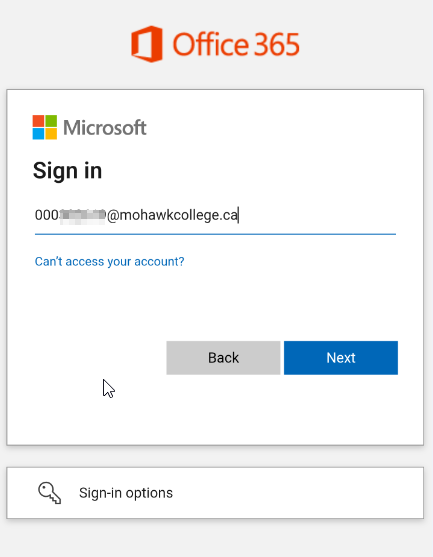
- A login pop-up will appear. Enter your EmployeeID [at] mohawkcollege.ca (EmployeeID[at]mohawkcollege[dot]ca) (e.g. 000101060 [at] mohawkcollege.ca (000101060[at]mohawkcollege[dot]ca)) and click Next
- You will return to the Add Account window. Click Finish

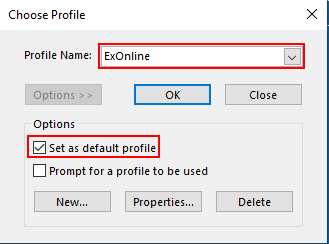
- Re-launch Outlook. It will ask you to choose a profile. In the Profile Name drop-down, select ExOnline. Check the box next to Set as Default Profile, then click OK.
Outlook Shared Mailbox and Shared Calendar Setup
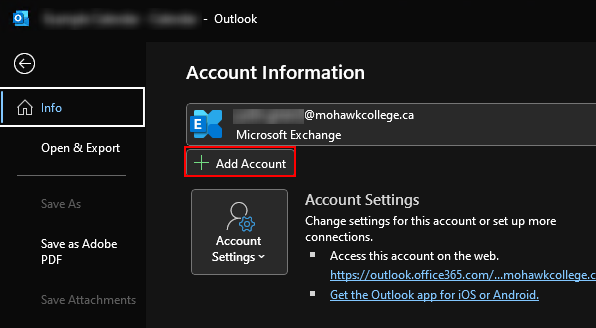
- In Outlook, click File > Add Account
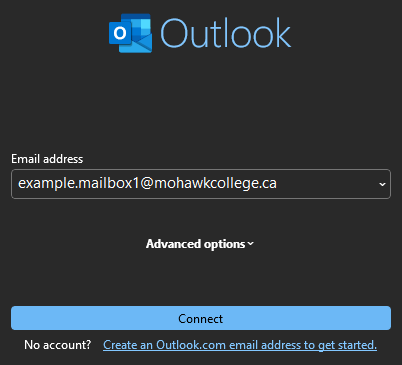
- Type the full email address of the mailbox you wish to add. Click Connect.
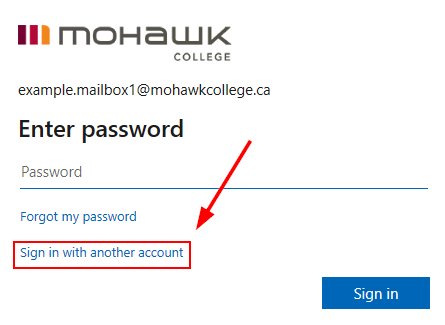
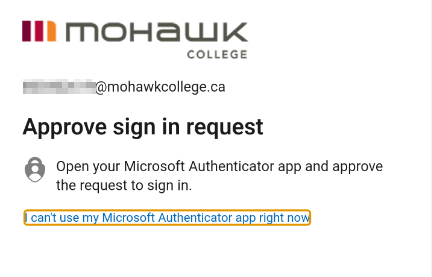
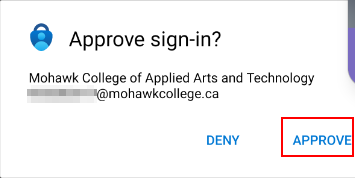
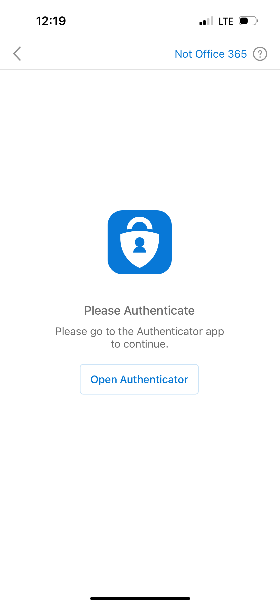
- A prompt will appear to enter a password. Just below Forgot my password, click Sign in with another account. Have your authenticator device ready.
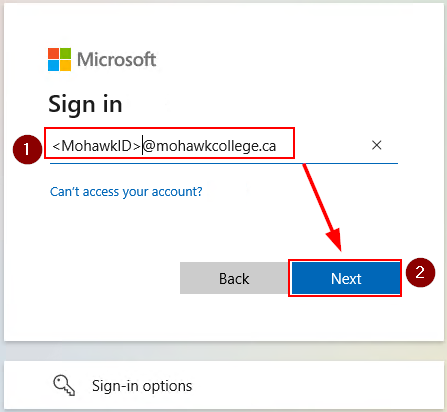
- Enter your username MohawkID [at] mohawkcollege.ca (MohawkID[at]mohawkcollege[dot]ca) (e.g. 000101060 [at] mohawkcollege.ca (000101060[at]mohawkcollege[dot]ca)). Click Next.
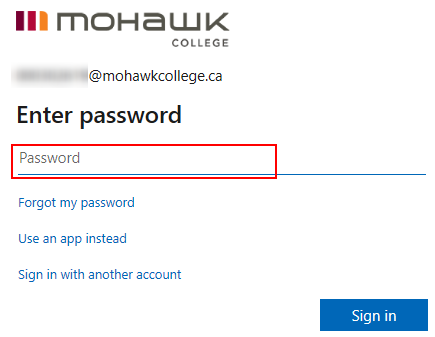
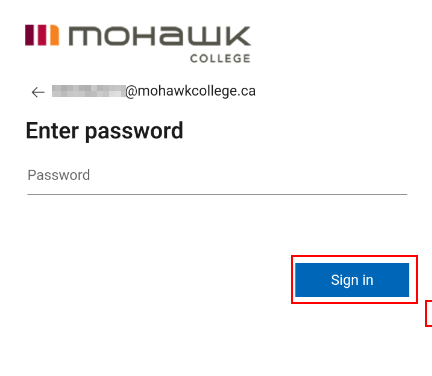
- Enter your account password and click Sign In. You may be prompted to enter a code or confirm on your authenticator app.
- Restart Outlook to make the shared mailbox appear in your profile.
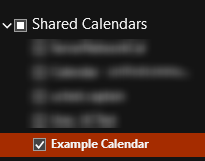
- In Outlook, go to the Calendar view. In the calendar list on the left side, right-click on Shared Calendar > Add Calendar > From Address Book

- Change the Address Book dropdown to Global Address List. In the search box, enter the name of the shared calendar. In the search results, double-click the name of the calendar, then click OK.
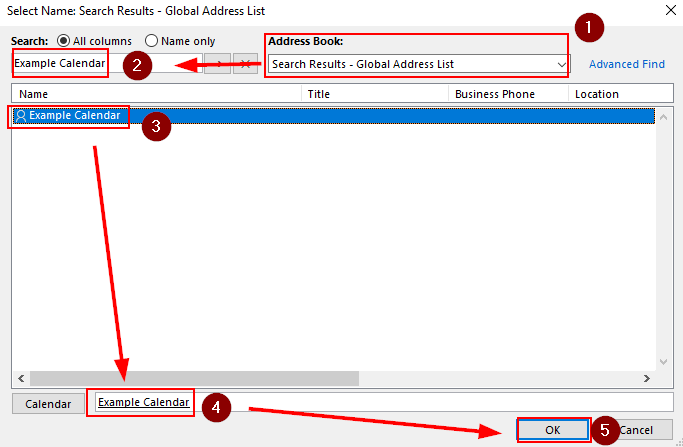
- The calendar will appear in the Shared Calendar section
Mobile Outlook App Setup
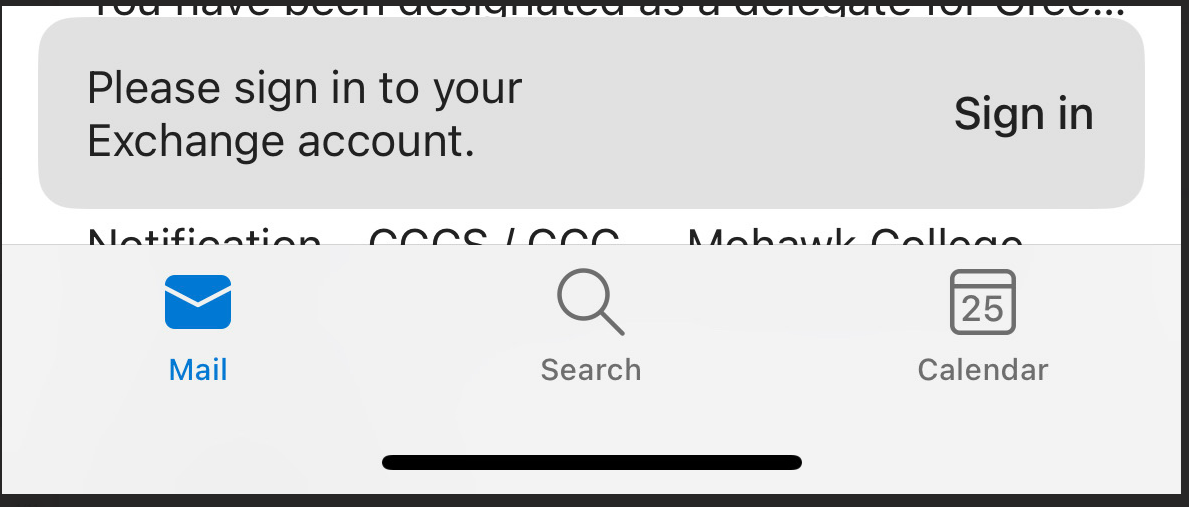
Outlook will give you an error after your email is moved to the cloud
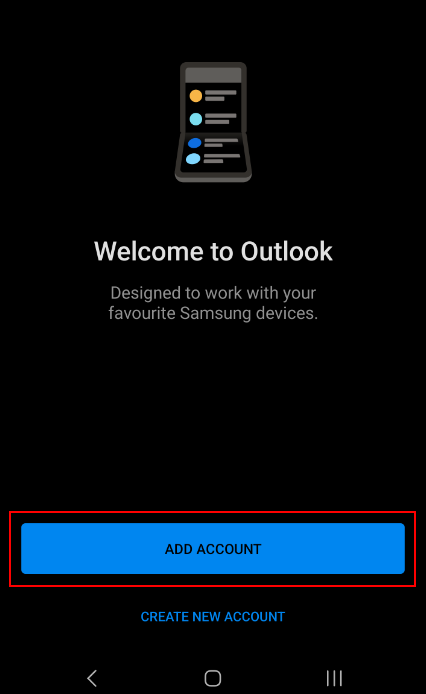
- Open the Outlook app and tap Add account.
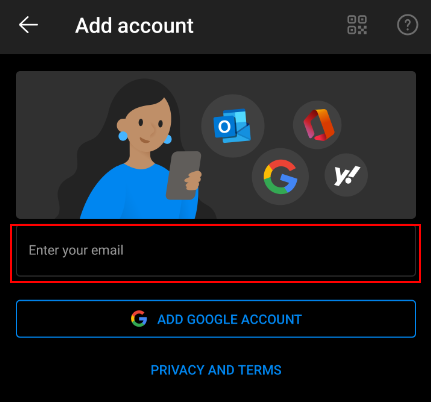
- Enter your email address, firstname.lastname [at] mohawkcollege.ca (firstname[dot]lastname[at]mohawkcollege[dot]ca) and tap Continue.
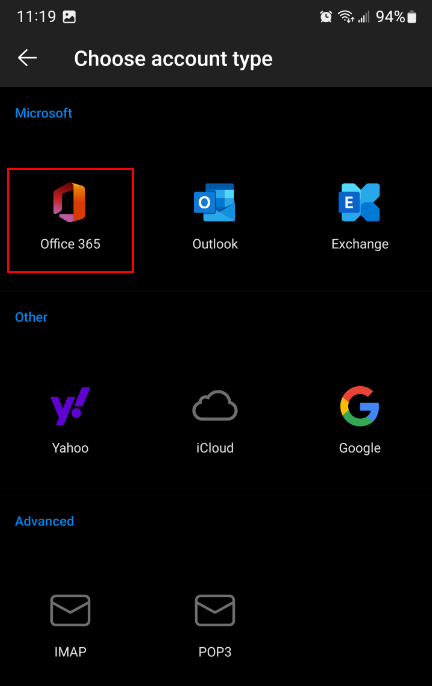
- On the next screen, tap Office365.
- Enter your username EmployeeID [at] mohawkcollege.ca (EmployeeID[at]mohawkcollege[dot]ca) (e.g. 000101060 [at] mohawkcollege.ca (000101060[at]mohawkcollege[dot]ca)) and password. Tap Sign In.
- You may need to answer a multi-factor authentication prompt to continue.
- When asked if you want to add another account, tap Maybe Later
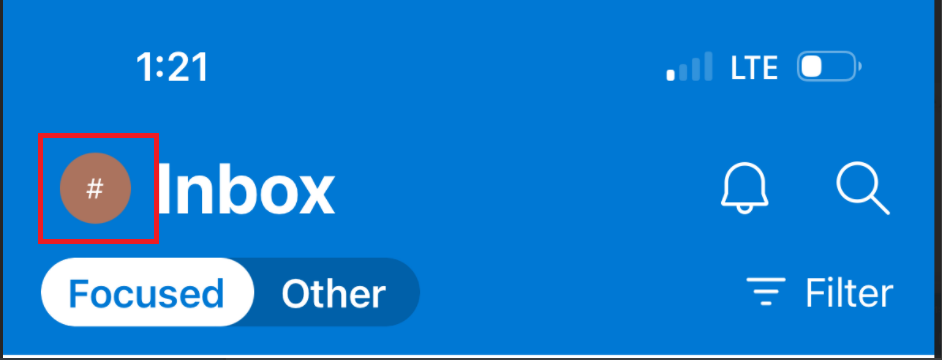
Outlook will give you an error after your email is moved to the cloud
- Open the Outlook app and tap the # icon at the top of your inbox.
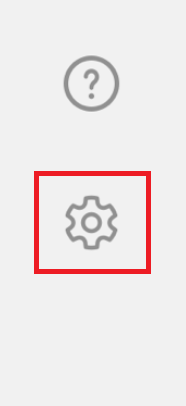
- At the bottom of the screen, tap the gear (settings) icon.
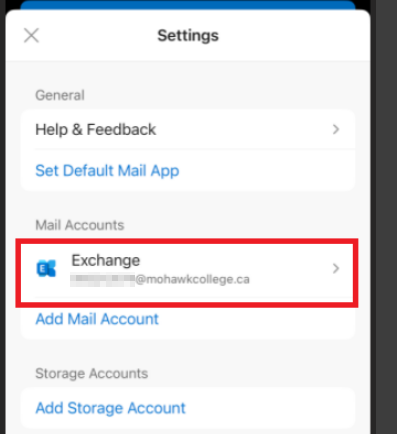
- Tap your Exchange email account, then tap Delete Account.

- Restart the Outlook app, then tap Add account.
- Enter your username EmployeeID [at] mohawkcollege.ca (EmployeeID[at]mohawkcollege[dot]ca) (e.g. 000101060 [at] mohawkcollege.ca (000101060[at]mohawkcollege[dot]ca)). Tap Add Account.

- Accept the multi-factor authentication prompt.
- Enter your username EmployeeID [at] mohawkcollege.ca (EmployeeID[at]mohawkcollege[dot]ca) (e.g. 000101060 [at] mohawkcollege.ca (000101060[at]mohawkcollege[dot]ca)) and password. Tap Sign In


- When completed, the app will ask if you want to add another account. Tap Maybe Later

If you are using the iOS Default app for mail, you will need to update your settings to receive information from your migrated email.
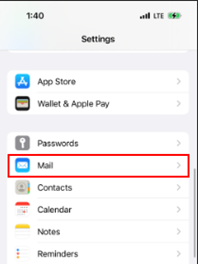
- First, you must remove your existing account. From your main screen, tap Settings.

- Locate and tap Mail.
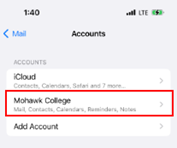
- Tap Accounts.

- Tap your Mohawk College account.
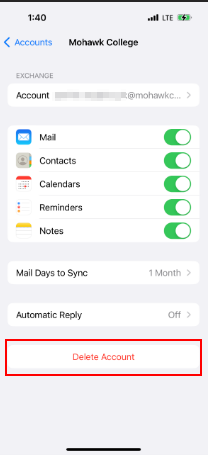
- Tap Delete Account.
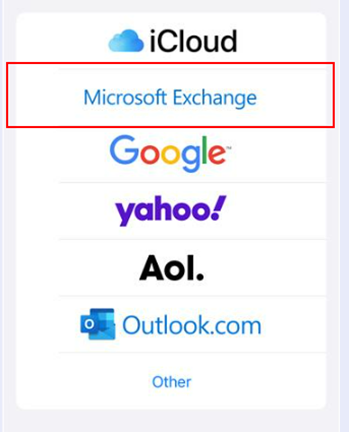
- Return to the Home screen. Tap the Mail app.

- Tap Microsoft Exchange.
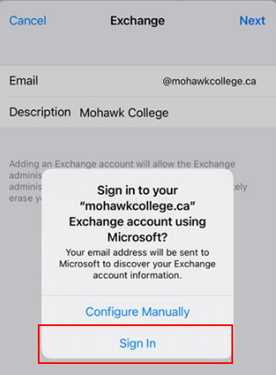
- Enter your email address (firstname.lastname) and the description Mohawk College

- A prompt will appear. Tap Sign In.
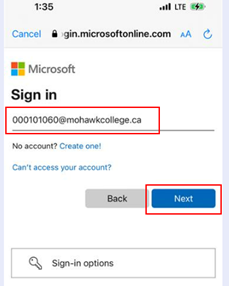
- Enter your 9-digit MohawkID [at] mohawkcollege.ca (MohawkID[at]mohawkcollege[dot]ca) (e.g. 000101060 [at] mohawkcollege.ca (000101060[at]mohawkcollege[dot]ca)), then tap Next.
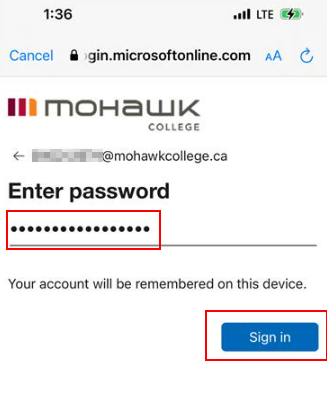
- Enter your password, then tap Sign In.
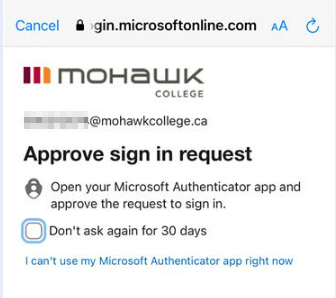
- You must authorize the login using your Authenticator app. Follow the prompts to approve the login request.
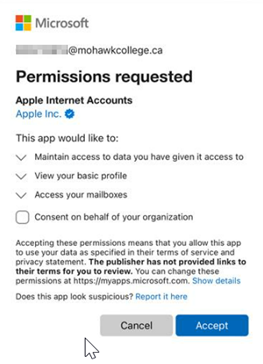
- Accept the permission request.